Migration

Migrating your website to Zonit allows you to centralize all aspects of website management in one place, benefit from Zonit's optimization and security services, and experience a seamless website management process.
Benefits of Migrating Your Website to Zonit
- Unified Management: Manage all aspects of your website and domain in a single panel.
- Performance Optimization: Take advantage of Zonit's services to improve your website's speed and security.
- Expert Support: Access Zonit's specialized support team for resolving potential issues.
Steps for Migrating Your Website to Zonit
-
Purchase an Appropriate Plan
Select a hosting plan suitable for your website's needs. -
Choose "Create or Migrate Website"
Select the "Migrate to Zonit" option. -
Choose a Migration Method
Different migration methods are explained below. -
Proceed with Migration Steps
Follow the steps based on the chosen migration method. -
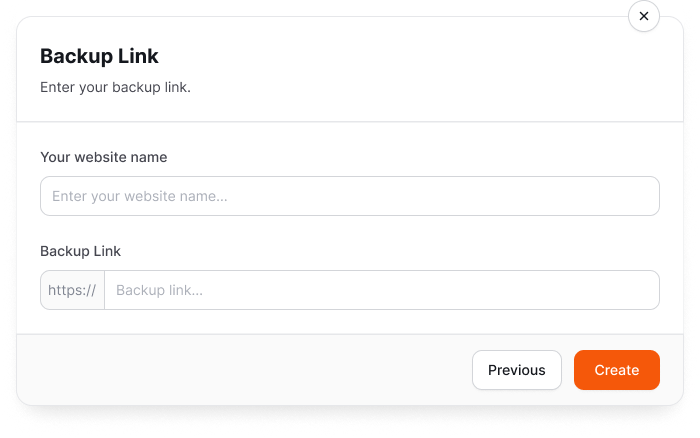
Enter the Full Backup Link
Click "Next" and provide the full backup link without a password.
This backup link should include all files, databases, and settings from your previous hosting provider. -
Choose a Website Name
Enter the website name as part of the migration process. -
Initiate the Migration Process
Click to begin the migration. -
Wait for Migration Completion
The migration process may take a few minutes to a few hours, depending on the data volume and server speed.
Migration Methods
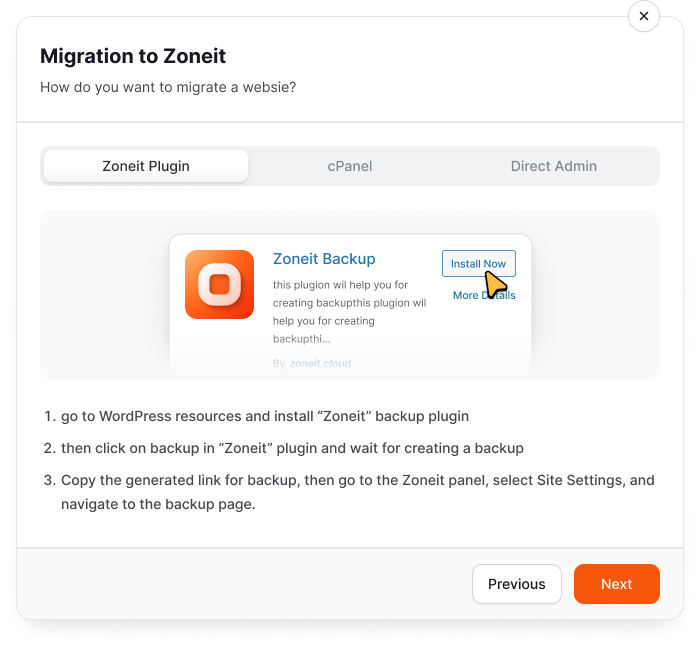
- Using the Zonit Plugin
- Install the Zonit Backup Plugin.
- Click on the "Backup" option in the plugin and wait for the process to complete.
- Copy the generated backup link and proceed to the next step.
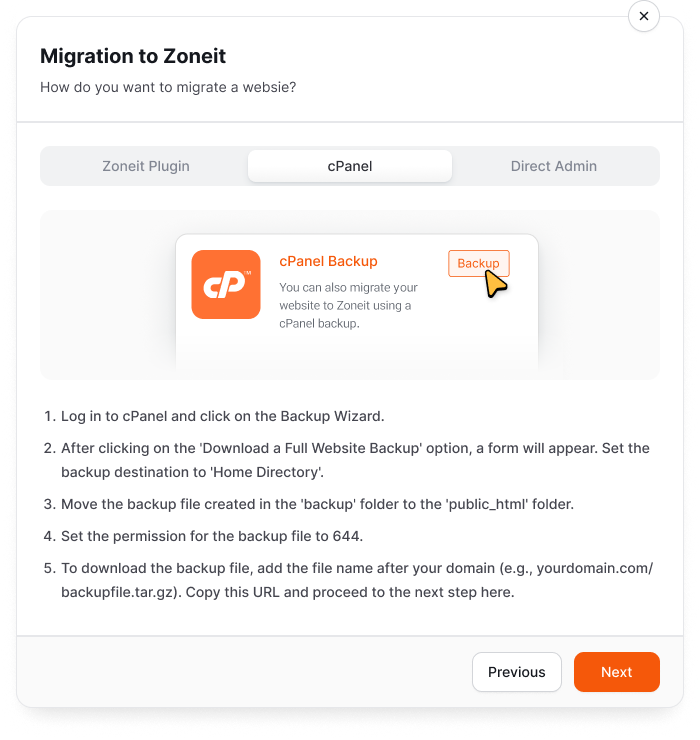
- Using cPanel Backup
- Log in to your cPanel account and click on Backup Wizard.
- Select Download a Full Website Backup and set the Backup Destination to
Home Directory. - Move the generated backup file from the
backupfolder to thepublic_htmldirectory. - Set the file permissions of the backup file to
644. - Create a URL for the backup file (e.g.,
yourdomain.com/backupfile.tar.gz), copy it, and proceed to the next step.
- Using DirectAdmin Backup
- Go to Advanced Features and click on Create/Restore Backup.
- Select the items to migrate and click Create Backup.
- Move the generated backup file from the
backupfolder to thepublic_htmldirectory. - Set the file permissions of the backup file to
644. - Create a URL for the backup file (e.g.,
yourdomain.com/backupfile.tar.gz), copy it, and proceed to the next step.
